
Runcam Thumb – Is it worth it?
Price
Disclaimer: I paid for this camera out of my own pocket and have no interaction with Runcam beyond ordering the camera for myself. These opinions are strictly my own, and Runcam has zero input or knowledge that I even did this article.
Yes, I am starting with the price. As this is a $50 camera compared to something like the Peanut which is an over $200 camera, this makes a big difference in the “worth”.
There is something to the saying “You get what you pay for.”, except I don’t think that is fully true in this case.
Configurability
The camera, once you upgrade the firmware to 2.1.0 (or newer since the time of this post), has the ability to be configured by putting a file in the root of the SD card. From the start, after you update the firmware, you will want to enable the two settings as I have them, or you will not get decent gyro information that matches the video.
; Video settings
[Video]
; Resolution.
; Available values: [0]:1080p60fps; [1]:1080p50fps; [2]:1080p30fps;
; Default value: [0]
videoResolution=1
; Gcsv file:Please use a high-speed card above 64G and configure the video resolution to 1080p@50fps;
; Available values: [0]:OFF; [1]:ON;
; Default value: [0];
GCsv=1
In this we are setting the video to 1080p at 50fps, and then enabling the gyro data. Which, as you see in the comment block of the setting, requires that resolution.
In the same file you can change many of the video settings around saturation and white balance, and other settings. For now, I have all of that set to default on mine.
There is no bluetooth or wifi on this camera.
Power
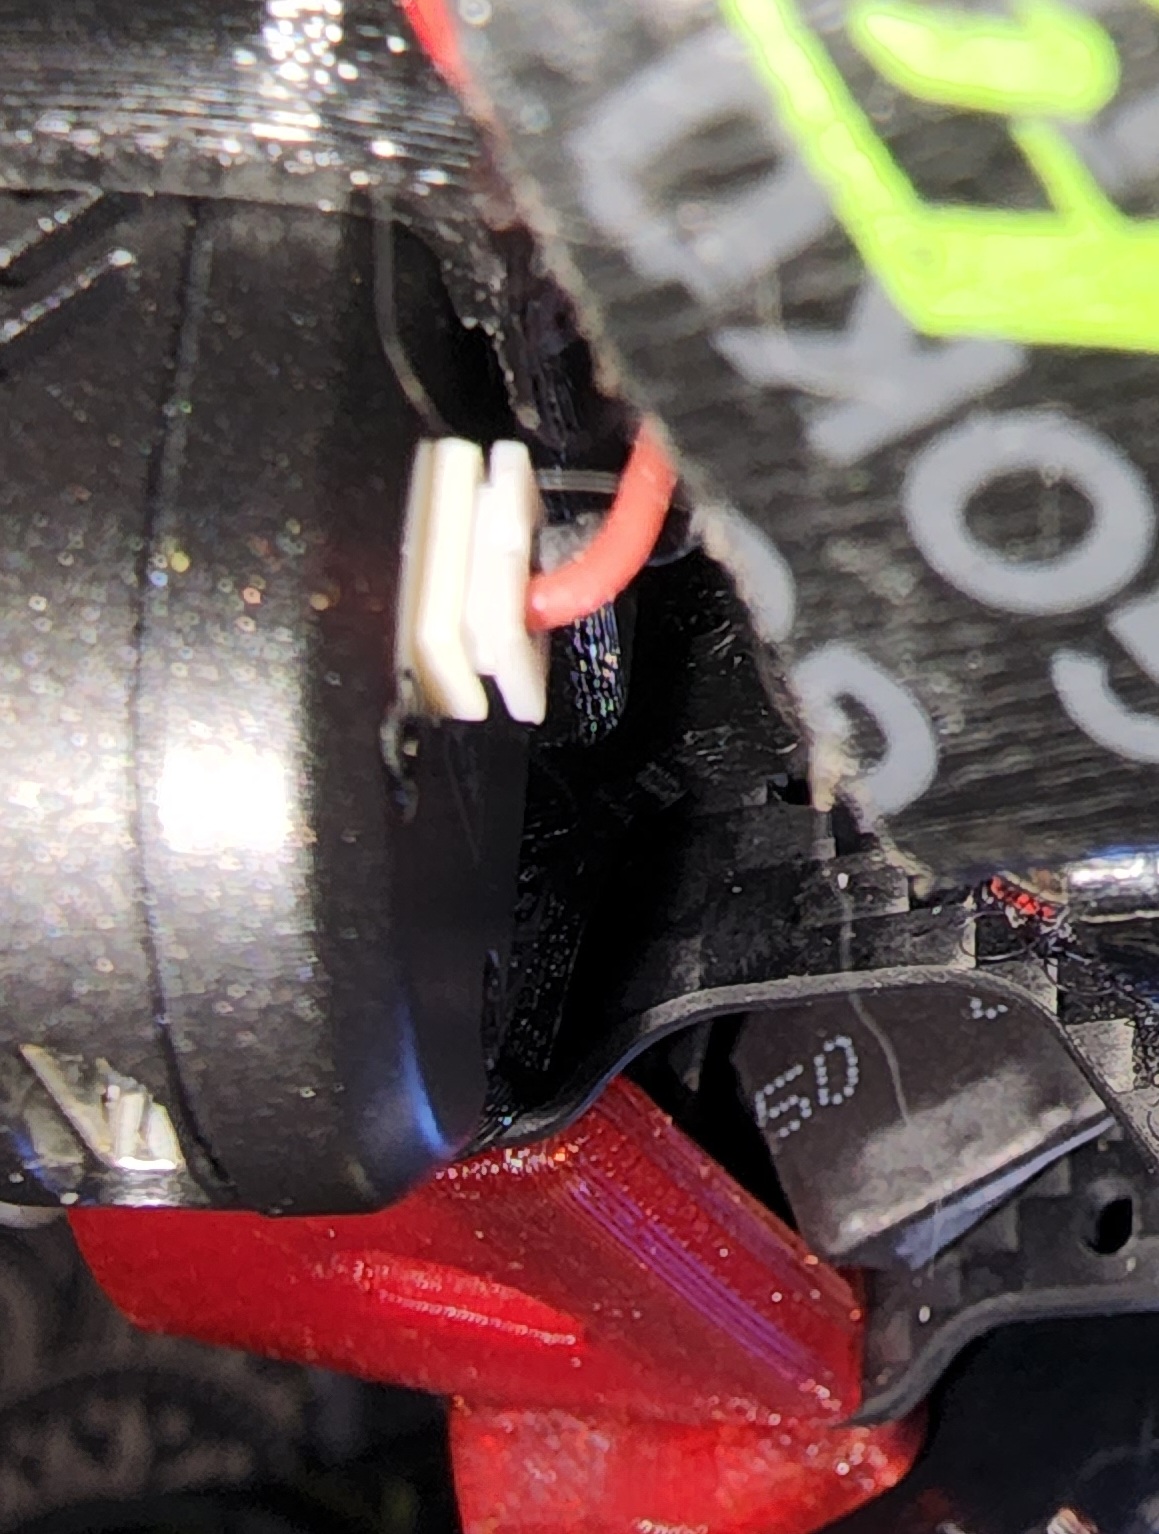
The camera comes with a special wire that you solder to a 5v/GND on the flight controller.
The complaint I have about this is three fold.
- The power wires are backwards compared to the “standard” for the type of plug. Be careful if you buy more power leads from another vendor, as the red and black are reversed.
- The plug isn’t easy to put into the camera, and you can accidently damage the leads trying to get it to seat fully.
- The camera does not support aux enable/disable for recording.
I don’t like how they did it.
It will power off the USB for access to the files, firmware updates, and you can also use it as a webcam.
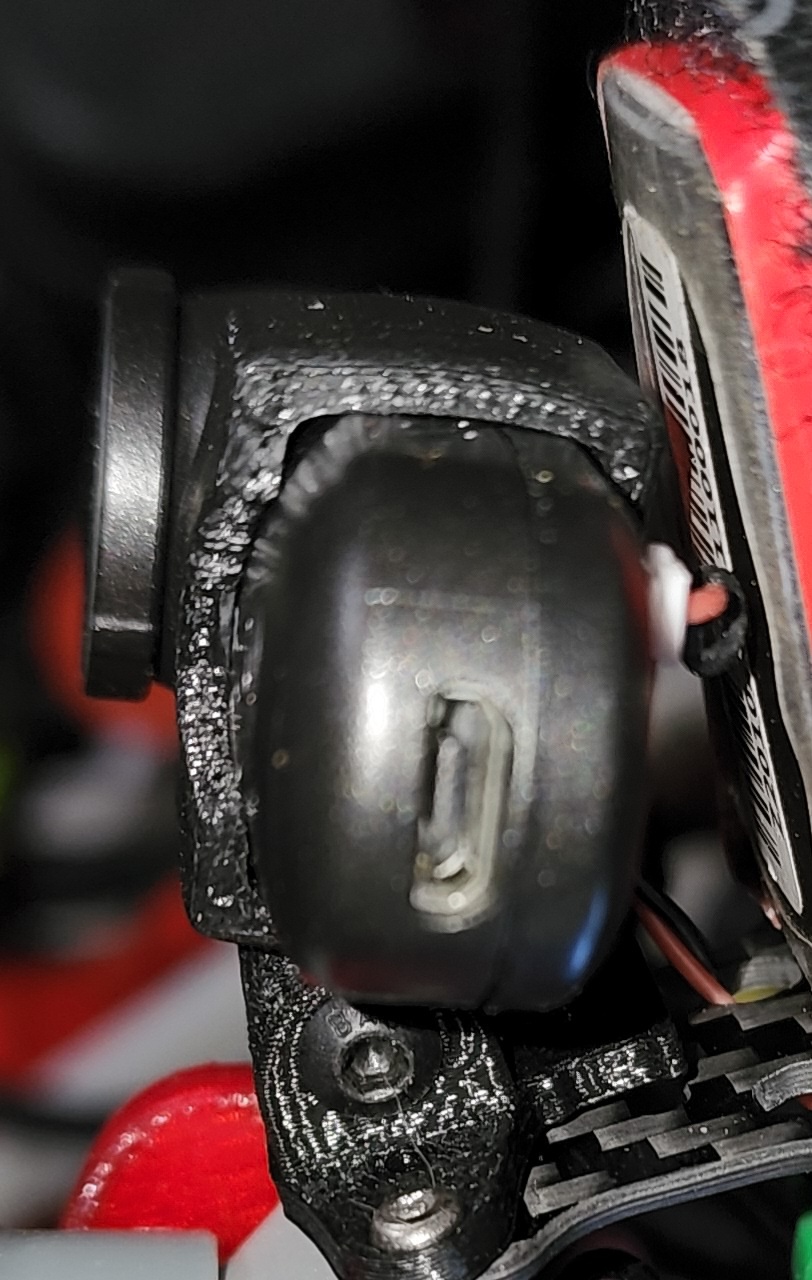
USB Features
The USB port is a micro usb plug, which can be a bit of an issue when trying to plug into it. It does come with a cheap cable, but I do highly recommend getting a better one if you don’t already own one.
The following can be done with the USB port:
- Copy files to and from the SD Card. This includes Firmware Updates, Configuration, and videos
- Press the button while on USB to switch to WebCam mode
The quality in webcam mode isn’t very good, but if you needed something in a pinch, it works.
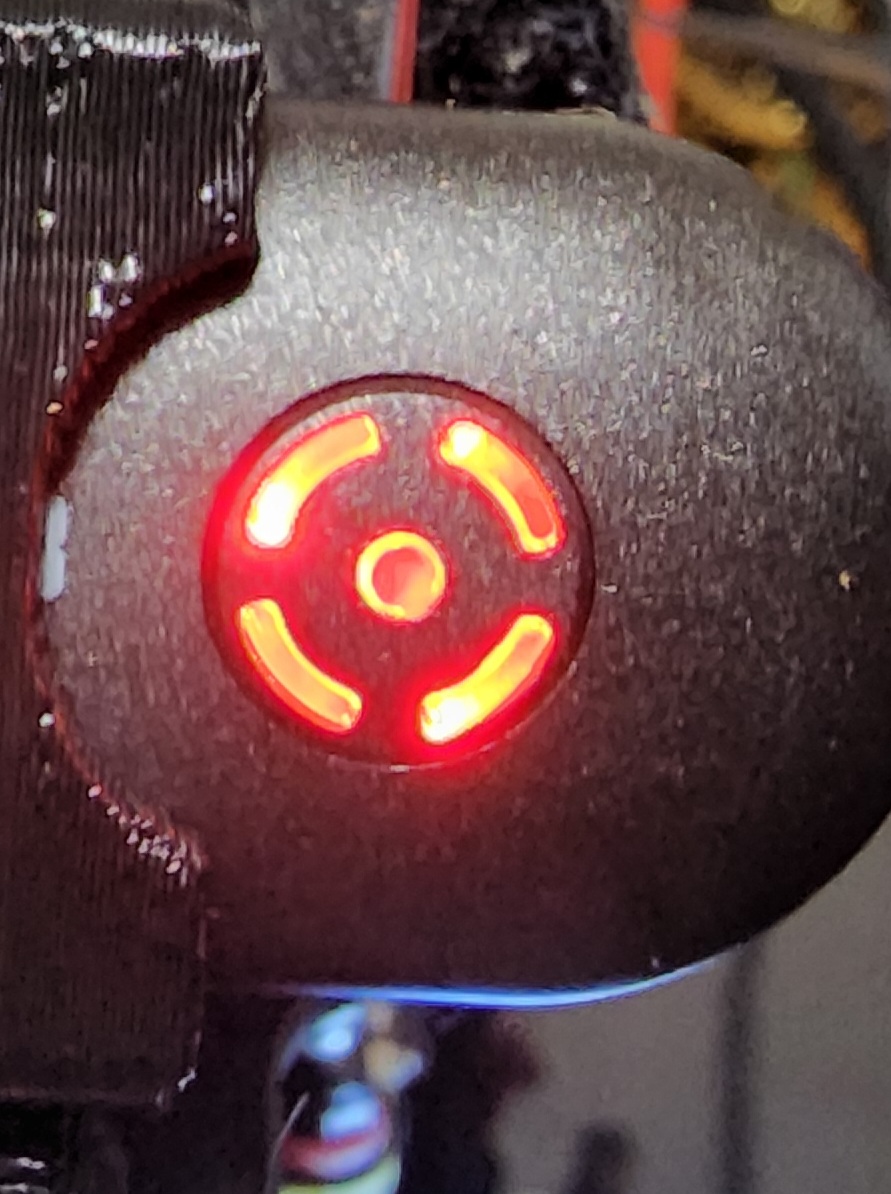
Multi-Function Button
The button on the front is also the LED indicator for the different things it can do.
When you apply power from the FC/BEC, the camera has three things for the button/led.
- Start Recording
- Stop Recording
- Missing SD Card
When recording is happening, the LED will blink slowly. When the recording is stopped, the light will be solid. If the SD Card is not seated properly, or is just missing, it will rapid blink.
When you apply power from the USB, the camera button/led has the following modes:
- Solid Red – Memory Card reading/writing
- Slow Blink with Green – Power cycled and loading new firmware
- Single Press yet still Solid Red – DEMO1 Webcam mode enabled
Yup, there is no way to tell what mode you are in by looking at the camera itself. A bit of a flaw in my opinion.

As you can see in the webcam mode, the video is a bit dark, and yet blows out easy. This is somewhat the same when recording video in flight as well.
The help guide that comes with the camera covers firmware updating, so I will not do that here.
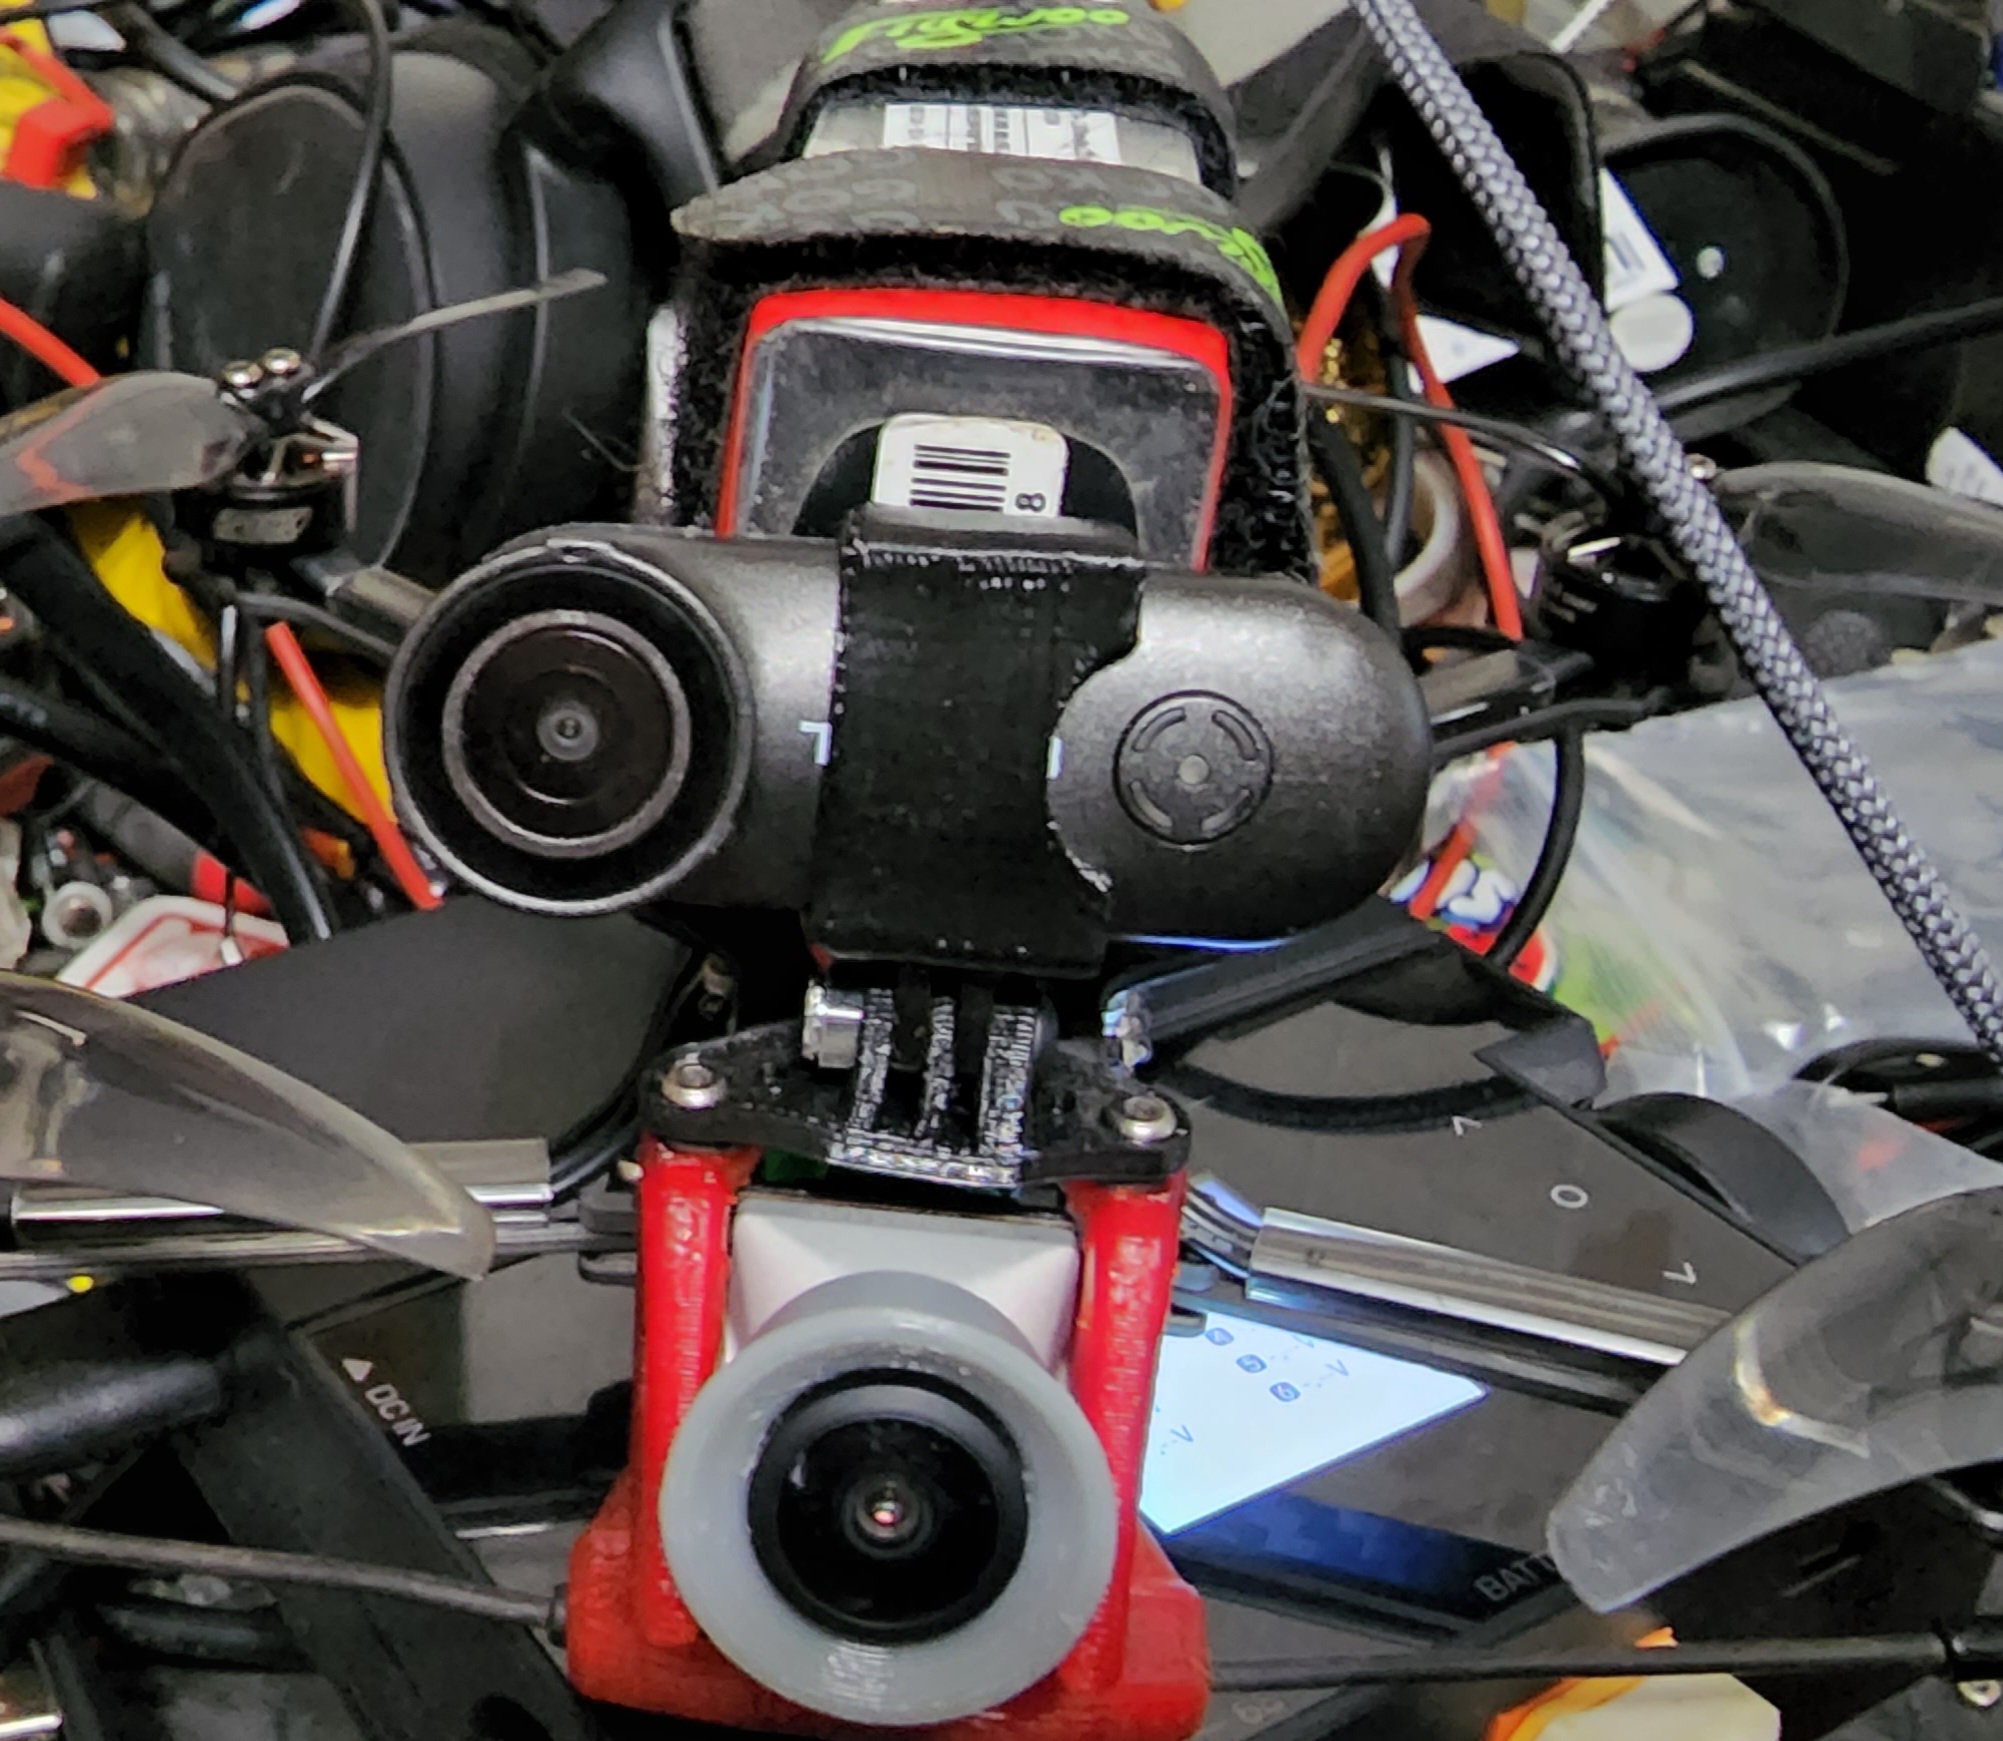
Flight Video
Well, this one is easier to just show rather than speak to it. As I mentioned above, I have only used this camera at default settings for all but the resolution/fps and gyro data.
I will point out, give this camera a good 5 second count after you stop the video before you remove power, or it will corrupt the file. I had this happen twice. It would seem there is a latency between reality and what the camera is writing to the card.
As I live in Oklahoma, where it can be bright as… you get the word.. I decided to try the camera from the start with the supplied ND filter on it, and I can say without a doubt, it made the jello worse.
When I put back on the “clear” lens guard instead, the video came out much cleaner, and GyroFlow took care of most of it.
And then of course, I had to do a flight for the dogs. In this one, I also PIP’d the DJI goggle DVR so people can see the difference. I also left the audio of the props on this one, but the music is over top of it. If people want, I can upload an unedited clip of the audio.
Is it worth it
Short answer: Yes.
Long answer:
If you are looking for a cheap entry level camera that you can put on almost any drone with out worry of weight, this is the camera for you.
If you are looking for a cheap camera that won’t hurt as much when it breaks in a crash, this is the camera for you.
If you are a video snob who must have the cleanest possible video, or have phone connectivity, or a bunch of ND filter options, or or or.. This is NOT the camera for you.
At the price point of $50, I am very happy with the purchase. It has already done better than the other camera I purchased long ago that died after 2 flights with no warranty honored. (Will post about that later.)
This camera is also a win because of the weight. Yes, there are lighter cameras out there, but the fact I could mount this on a Tinyhawk 2 Freestyle without worry, is a big bonus for me.
What next?
Over the next few weeks I will be doing more flights, and also making a couple videos on how I process the camera recordings. In the process of that I will also be playing with the video settings in the file to try and bring back some of the saturation while keeping it able to deal with fast light changes.
Until then,
If you are not crashing, are you learning? -Z

